
DIY Reversible Dinosaur Cape
As many of you know, #JasperBean is a Dinosaur fanatic! So after browsing on Pinterest, I decided to make him his own dinosaur cape for halloween this year. The days will soon get colder, so this would be the perfect winter warmer for him. We’re ready to go kick some leaves or build a snowman in the park!
If you’re a mum, you will know, your toddler’s words need to be adhered to! So I let him choose his own fabric colour, whether he wanted spikes on the back and whether he wanted a hood. After deciding on the important bits, we went fabric hunting!
The Fabric

I went with fleece as the main fabric because it’s soft and warm. The vibrant colours are easy to cut, sew and wash. #JasperBean decided that his dinosaur was going to be green with yellow, blue and red spikes on the back and the hood. For the inner lining, I purchased more of the blue fleece as it wasn’t too overpowering. Since the dinosaur cape was reversible, it isn’t such a shocking and overpowering colour either.
Fabric: I measured #JasperBean from his neck down to where I wanted the cape to end and then multiplied that by 2. This meant I needed roughly 1 metre of fabric, but I purchased a little bit extra for the hood. Green/Blue 1.5 metre x 1metre , Red/Yellow: 20 cm x 1 metre.
Total fabric price: £22.10
Cutting the Fabric

- Fold the 2 large pieces of fabric in, edge to edge twice, so it ends up a quarter of the original size of your fabric.
- From the folded corner measure out the length you want the hem of the cape to end. For me that was roughly 24 inches. Mark your quarter circle with pins or chalk and then cut along.
- For the neck hole, I measured the circumference of #JasperBean’s neck and then divided that by 4, but this can be a rough estimate. You don’t have to have a round neck hole like mine, you can always just use a slit.
 Because I was also going to add spikes to the back of the dinosaur cape and an opening at the front. I cut along the middle of the folded circle so that the 2 full circles became 4 semi-circles. You can always just cut one side, so it becomes a poncho.

Spikes for the back of the cape. These measured 10cm wide and 12cm high and I made sets of 3 in the 3 chosen colours.
I didn’t have a patten for the hood, so took the hood off an existing jacket he had and used that as my guide. Since there was spikes on the back of the hood as well, I cut out 4 pieces of fabric so that the finished hood would have 2 layers just like the rest of the cape.
Sewing the pieces together
Step one was to line the 4 pieces of blue and green fleece together inside out and sewing the bottom hems of the semi circle together. With this complete, I ended up with 2 semi-circles.
Next I pinned in the spikes alternatively (red, yellow, blue) between the green fleece and sewed on the underside so that the spikes stuck out on the black when flipped the right way up.
Inside:

Outside:

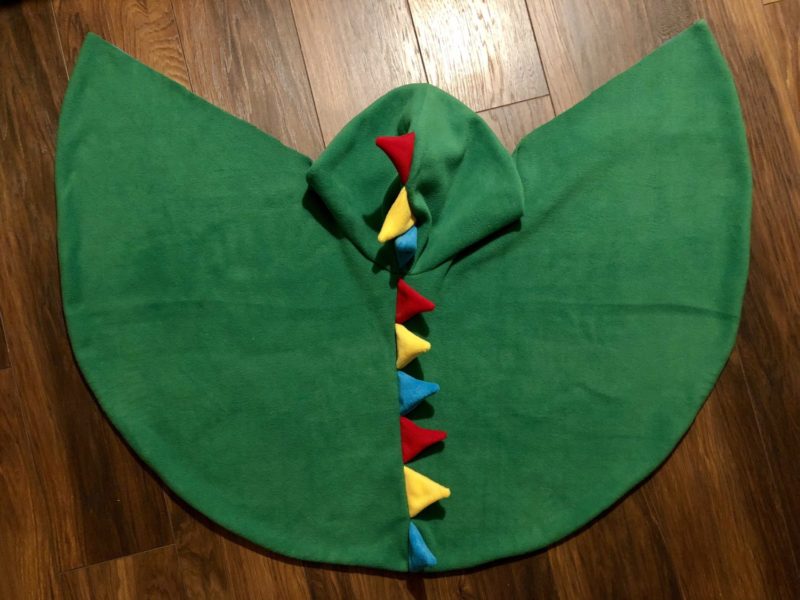
Inside of the dinosaur cape: In the below image, you can see the spikes are sewed inbetween the 2 semi circles, this view is the inside of the cape. I forgot to take a photo of what it looked like before I added the hood! So sorry! Basically, I attached the spikes onto the cape and hood separately and then sewed the hood onto the cape around the neck and ended up with the image below.

With the spikes attached, I repeated the same steps for the blue fleece (minus the spikes). I ended up with 2 almost identical pieces – one green with spikes and one blue without. I lined the 2 pieces together inside out and sewed the rounded side up first. (If you want to add dinosaur teeth, you can sew them in when doing the hood – refer to image at the bottom). Then moved onto the hood, leaving the front opening of the cape unsewn (for now).
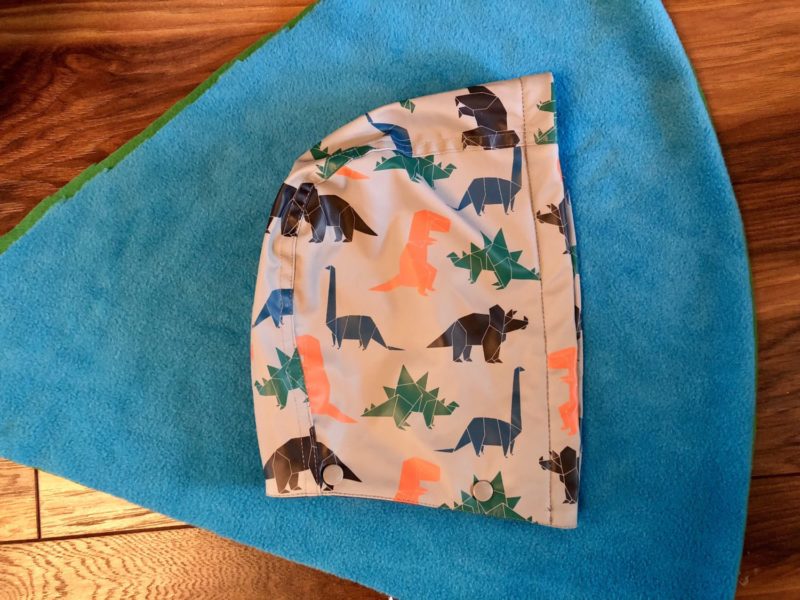
The next image shows the sewn dinosaur cape turned right side up. All the stitching is neatly hidden between the blue and green fleece. Hence can be worn on either side! Next, I had to of course try it out on my son just to see how it fitted. It turns out the semi circle shape was too big for him, so I ended up cutting about 4 inches of material off the edge of either “wing” (images shown below are the cut versions).
The back with spikes:
From here, you can sew the front opening, but I decided to add some arm slits first. It won’t make a difference whether you sew the front or not right now, but I just chose not to.
Finishing Touches
Arm Slits:
#JasperBean measures roughly 9 inches from his neckline to elbow and I used that as my guideline. The slits were 6 inches long and roughly 8 inches from the front opening. Again, this can be tailored to your own preference.

After cutting the slit through both materials. I used a plain blanket stitch around the slit as fleece does not fray, but I wanted it to look tidy. I also added a little flap on top because it looks better than 2 holes in the cape. Repeat this on both sides and you’re done!

Pockets:
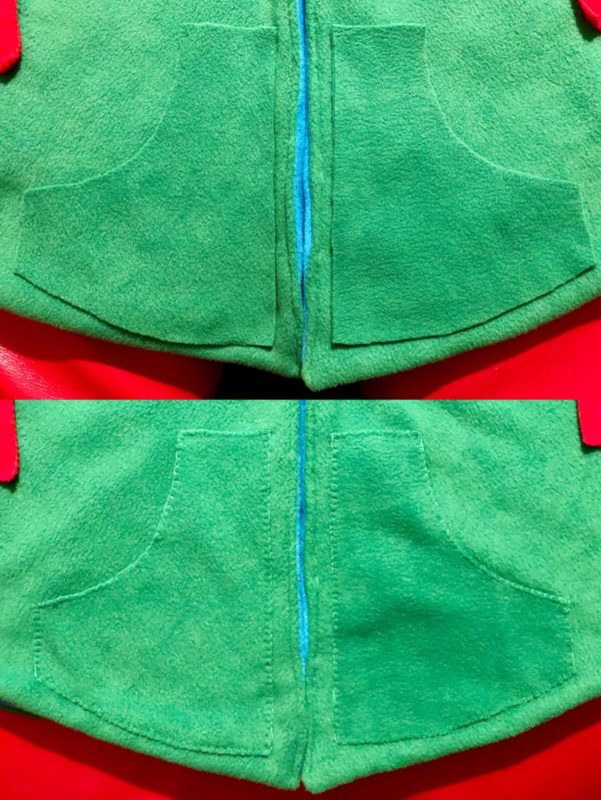
Pockets! Just because a toddler has endless amounts of things they want/need to pick up. Sweets, paper, cards, rock, small toys, tissue, pen caps… I drew the shapes of the pockets freely based on the shape of the cape. So really, you can make pockets of any shape or size you like! Again, I used a basic blanket stitch to attach the pockets and voila!
Buttons
You have the option to use long pieces of fabric/rope to tie in front of the neck or velcro tabs. I chose to add buttons because they look more interesting. However, instead of cutting button holes into the cape, I sewed in button loops.

Teeth
Because dinosaurs have teeth. In hindsight, I should have added the teeth when I sewed the hood together. But it just shows that it’s never too late!

Eyes
“The better to see you with” – made with a small piece of white fabric and buttons!

A Roaring Dinosaur Cape


Happy Halloween!!
Think this is too much work or advanced for your sewing skills? Why not check out my easy “Bloody Butcher” halloween costume from last year. No sewing required!
Hope you’ve enjoyed this and if you have any questions, please do not hesitate to drop me a comment or direct message!
Until next time…
Love, MsMamaBean x


Comments
This looks absolutely fab and he looks so cool! Thank you for linking to #Thatfridaylinky please come back next week
Thank you! 🙂
This is such a neat idea! Perfect for Halloween. It looks so warm!
Thanks! I really is so warm, now I want one myself! 😂
Superb and brilliant to see someone actually making things like this instead of just heading to the supermarket and buying something that may well be costly and potentially unsafe too. #TwinklyTuesday
Thanks Kate! Hmm, I never thought about the supermarket ones being unsafe, but yeah maybe that’s something to take into consideration as well. I just love making things and think they mean so much more than just store brought 😊
What a clever idea, looks really good X #twinklyTuesday
Thank you! I really enjoyed making it.
This is amazing!! I have two little dinosaur fans and I’m not afraid to admit that I’ve just forwarded this onto my mum…I know my limits 😂 We do #dinovember so I’m thinking two of these would make a fab parting gift from the dinosaurs this year!! 🦕🦖🦕🦖 #TwinklyTuesday
Thanks for sharing! What is #dinovember? Sounds interesting!
This is so cute! I am personally a dinosaur fan so I may make this cape for me! #DreamTeam
Haha thanks! I’m very tempted to make myself one too! Keep me posted if you decide to go ahead with this project! 😃