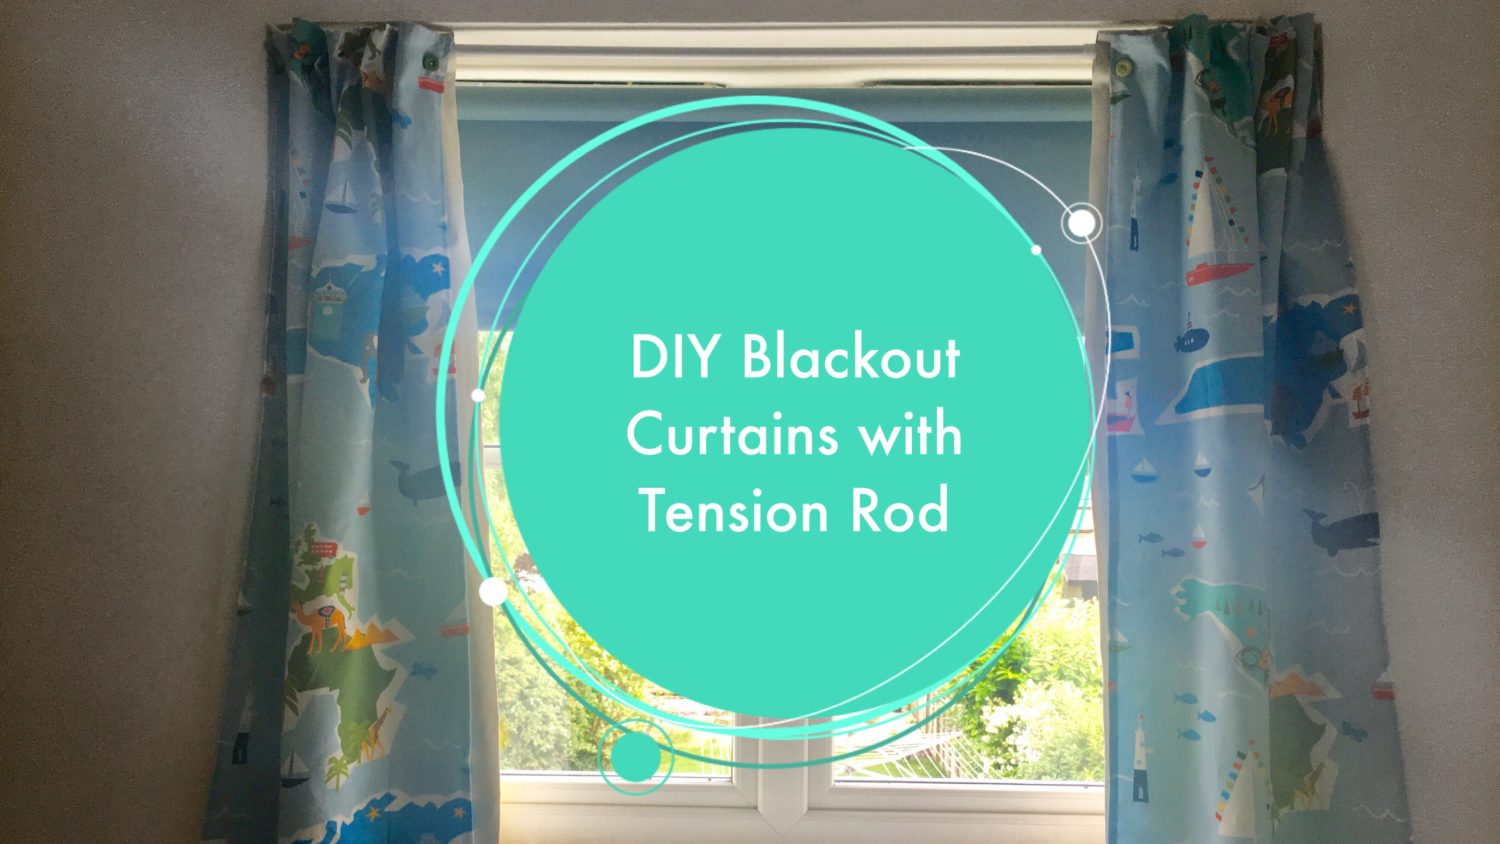
DIY Blackout Curtains with Tension Rod
* There has been another awful attack on our beautiful city of London on Saturday 3rd June. My thoughts and blessings go out to the family and friends who have been affected by this mindless violence. We need to stand united, we need to say it and mean it, we cannot tolerate extremism anymore. A massive thank you to the kindness of the public and emergency services, without you, we would be helpless.*
Since moving to our (new) house over a year ago, I have had blackout curtains for #JasperBean’s room on my to-do list. Why has it taken so long? Partly because we still co-sleep (read all about it here!) and partly because I’m just too darn busy being a mum and holding down a full time job. Okay, maybe because it wasn’t exactly on top of my priority list, so I got lazy. Now that #JasperBean sleeps in his own room during naptimes, I found putting up our portable suction blackout blinds every single time quite tedious, and it didn’t look pretty.
This is my version of a blackout blind held up with a tension rod! No screws, no nails, no drilling around!
Image 1:
a. Measure your window
– i. our window size was 100cm (H) x 116cm (W)
– ii: We brought:
Blackout fabric: 122cm (H) x 145cm (W)
Pattern fabric: 112cm (H) x 145cm (W)
Tension Rod: 100-150cm
Buttons: 14
b. Choose your fabric
c. With the blackout and pattern fabric, I cut this in half so that there were 2 pieces of each. Each measuring 70cm wide.

Image 2:
Fold the top 10cm of the blackout blind down and pin.
(The fabric side of the blackout fabric should face the window whereas the smooth polyester side should face the room.)
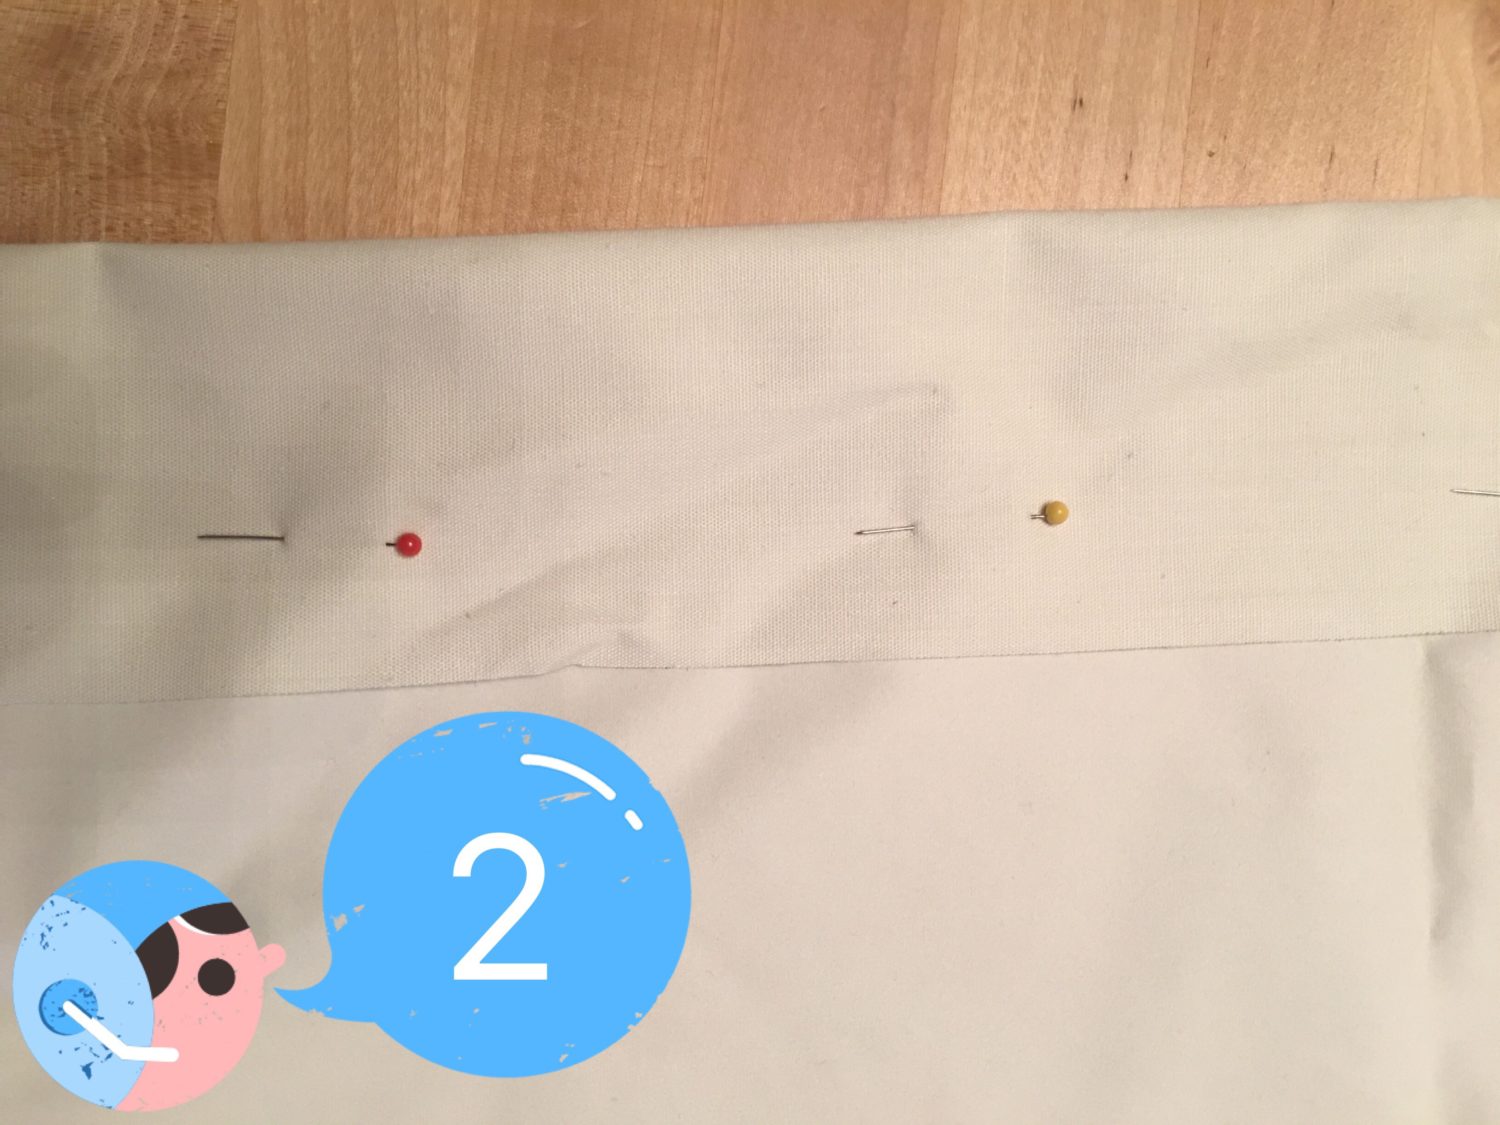
Image 3:
I used a zigzag stitch at the bottom but also added a straight stitch about 1 inch from the top of the fold. This is because I am using a tension rod to hold the curtain up and didn’t want a huge gap at the top letting light through. (Please Note: I didn’t hem the blackout fabric as it does not fray, therefore my blackout fabric is wider than the pattern fabric. If you do not prefer this, please cut the blackout fabric to the size of your hemmed pattern fabric.)

Image 4-6:
Image 4: From this image you can see that once the tension rod is thread through and the fabric is pushed to one side, the fabric scrunches up quite severely and it’s really not a pretty sight! Additionally, it was actually quite hard to push because of the amount of fabric there was.
Image 5: So, following from the above image, I flipped over the fabric and cut out rectangles that were roughly 2.5 inches wide.
Image 6: By cutting out some of the fabric and only threading through some, this reduced the amount of scrunching.

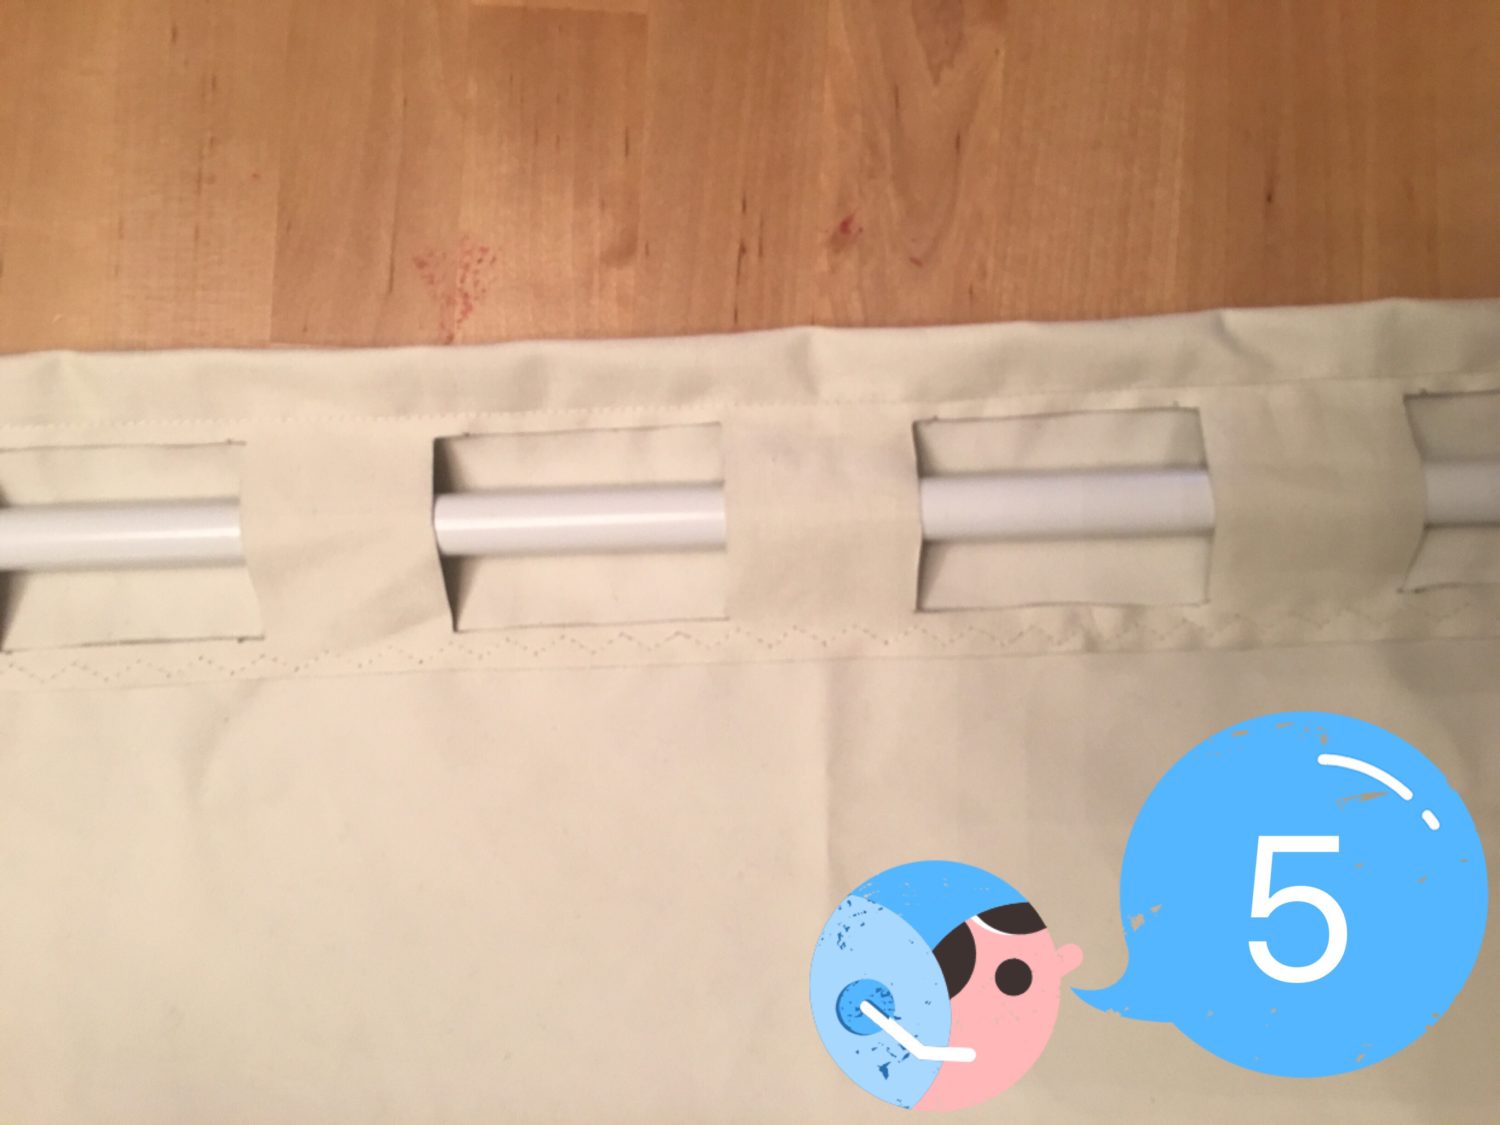

Image 7:
From image 1-6, the blackout curtain is essentially complete, but I wanted to add a pattern fabric on top. I’ll show you how I added the pattern fabric my way! (Hem the pattern fabric on all sides).

Image 8-11:
Image 8: I used buttons to attach my pattern fabric onto my blackout curtains instead of sewing it on directly. Yes, BUTTONS! This is so that I can (1) easily remove the top layer to wash and/or (2) change the pattern fabric for another without having to completely make the blackout curtains from scratch again.
Image 9: Blackout curtain with buttons on top (the buttons are spaced in between the cut out rectangles, roughly 4cm from the top.)
Image 10-11: Wider blackout fabric beneath the pattern fabric – held together with the buttons.


Image 12:
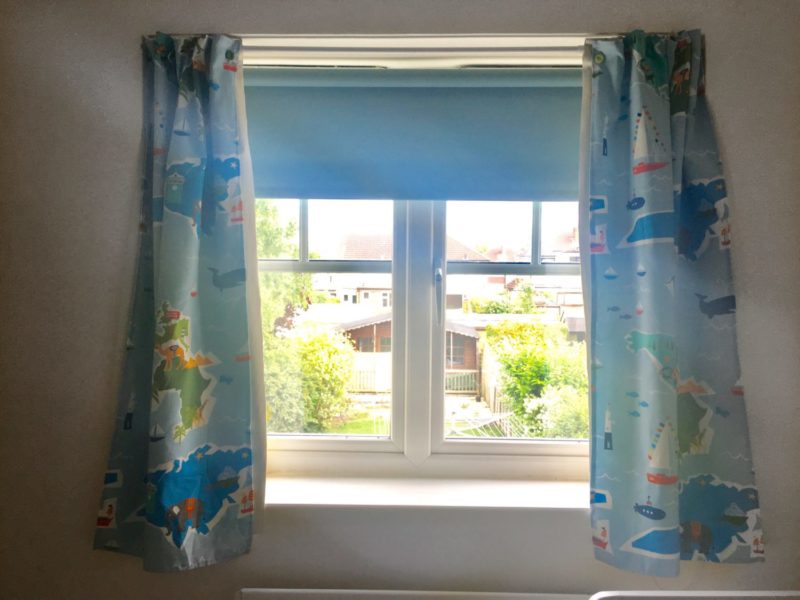
Image 12: The current window has an existing roller blind, although this does keep the light out, it is still too bright to sleep in.
Image 13: At first look, putting up the DIY blackout curtains with tension rod has already blocked out the majority, if not all of the day light. I must admit myself, it looks pretty good!
Image 14: Lights out! As you can see, the top has leaked in some light, but it is already doing a really good job! Since I am using a tension rod, I can just move the rod a little bit further up, no hammering, no screws, no nails to my wall! (Refer back to image 3 on why I stitched an inch fabric above the tension rod.)
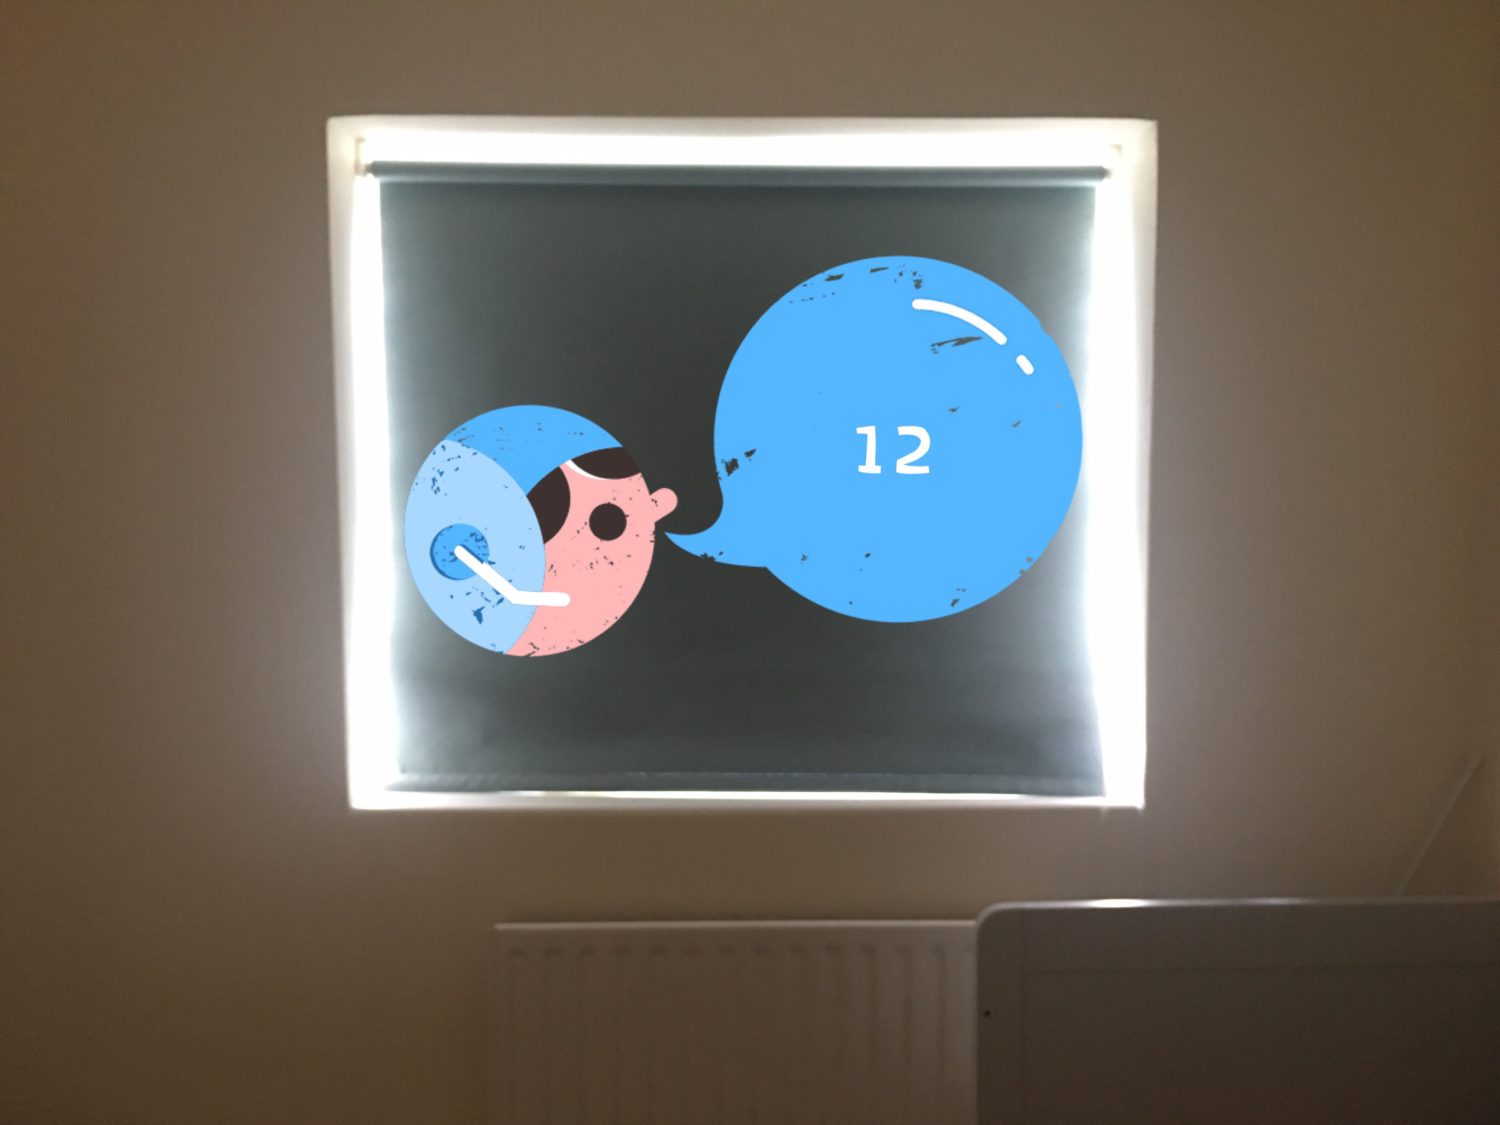


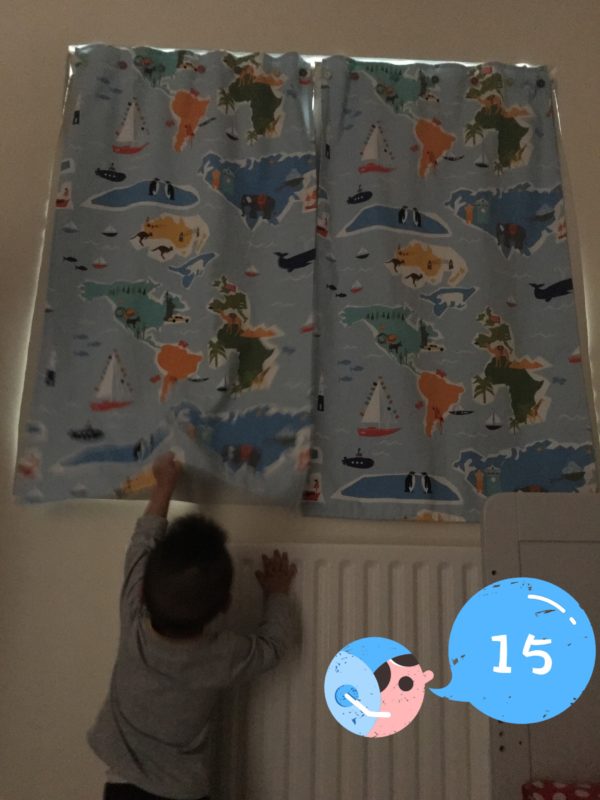
Image 15:
#JasperBean checking out his new DIY blackout curtains with tension rod! Where is the sunlight, mummy?

So this is my version of blackout curtains with tension rods! I can easily make different panels to go on top of the blackout fabric and change the look and feel of the room with different patterns! Most importantly, it does its job by keeping the light out and #JasperBean can enjoy the dark room by having a long nap and hopefully all night sleep very soon! How awesome is that?
Until next time,
Love Msmamabean
This post may contain affiliate links. Please refer to my Disclosure on the sidebar.
This post is linked up to the following linkys:


Comments
I love this fabric! Really nice curtains.
Thank you! 😊
What a great DIY project! These turned out amazing!
They did indeed, I’m really happy with them! 😅
I love these curtains! Such a creative craft to pursue. I’d love to try to make some curtains someday!
Much love,
Ashley | dearash.com
YES! I bought a sewing machine about a month ago because I need to make curtains. Thank you!
Oooh! Let me know how your curtains turn out!
Those curtains are lovely! Such an easy way of making them yourself at home!
Woah thanks for this diy trick. Gotta love those curtains! 🙂
I love this and so need to do this in every room of my house! I wake up at like 4 am or whenever the sun begins to peak and swear I overslept. Ugh its so hard to go back to sleep. Sometimes even the street lights bother me.
This would be perfect for you! Such an easy way to get better sleep! Try it out. X
I’d be lost without blackout curtains!! Both my kids still use them, especially at this time of year 🙂 xx #twinklytuesday
Even I still use them! Haha 😅
These curtains are adorable! Love them!
these are absolutley adorable , they turned out great and so easy to make <3 well done darling <3
Thank you 😊
we did this in our son’s nursery. A must have!!
This is fabulous! Seriously impressive! Zach has black out curtains in his room although they do still let some light in. Oscar is in our room and it is so bright even though our curtains are really thick! Yours looks brilliant! Thanks for linking up with #TwinklyTuesday
Amazing! I’m not good at using a sewing machine and making things like this (I run out of patience), but if I were, I’d be doing this DIY project asap as we urgently need a blackout blind. #DreamTeam
You did such an awesome job! They turned out beautiful! I love DIY projects like this and I love it when I can use tension rods because they are sooo easy!! 🙂
Love these curtains! What are super cute idea!
Incredibly adorable! And a wonderful tutorial for anyone who’d like to have a creative outlet 🙂
These are so cute!
perfect timing!!! I need one asap!
Hope this helps! X
I love this!! When my kids were small I made them take naps in a dark room as well.
Hi Nita, with longer lighter morning and evenings these blackout curtains are just what parents of younger children need!
Thank you for lining up with the #MMBC.
Wow, well done you, this is much much prettier then the ugly suction cup one that we used too. I love the fabric, I might have a go at this myself! Thanks for linking up with the #bigpinklink this week.
Oh these are adorable – our life changed completely when we got blackout blinds! Thanks for linking up to #dreamteam x
Absolutely agree, I can see my life changing already! 😊 I can’t believe I didn’t make these earlier!
These turned out great. Isn’t it fun to be able to do stuff like this. I made roman blinds with thermal blackout fabric for my sons. They sleep so well in the dark room.