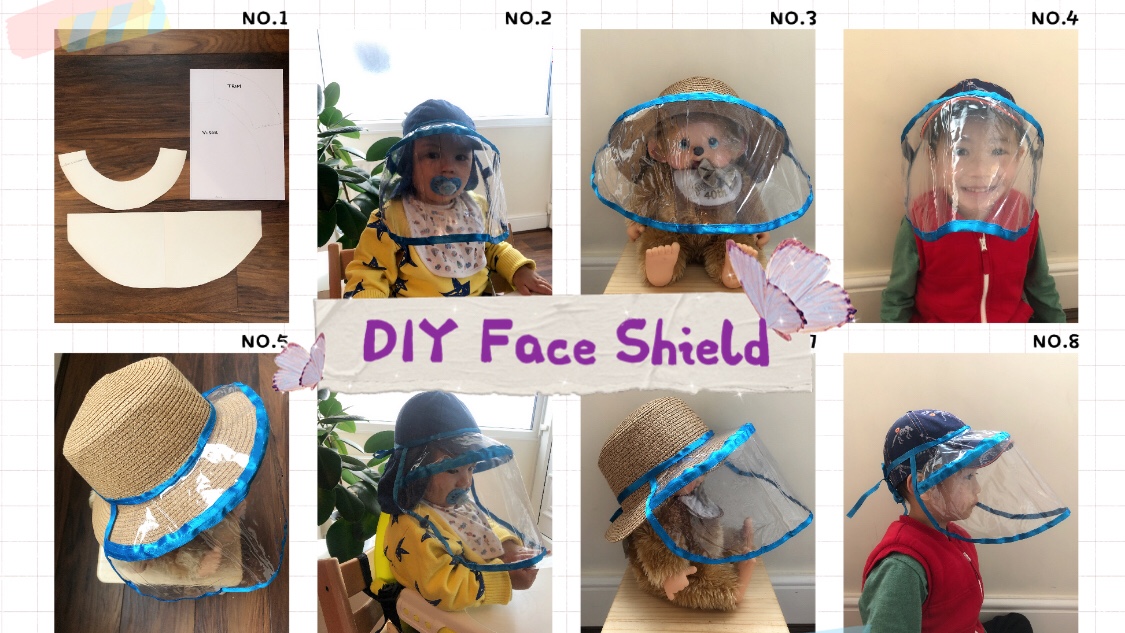
DIY Face Shield (Printable Pattern)
With the Coronavirus #Covid19 here to stay for the foreseeable future. We are all taking as many precautions as we need to stay safe. The best is, of course, to stay at home and keep a distance from people outside of our household as much as possible. We have used this time to cram in lots of learning and fun activities. But, if and when we need to go out, we will wear masks and wash hands regularly. However, how do you get a baby to wear a mask and keep it on? Whatever the answer is, I personally cannot get my 14 months old to wear a mask for longer than 1 second. It’s not even a game anymore, he will not let that thing near him! So instead I turn to the internet to find him something that will offer him some form of protection. This is when I came across the face shield. Not the rigid medical looking kind, but instead more like a cross between a veil and a visor. Unfortunately, these were only sold in Asia and the cost plus shipping delay would take forever. So I decided to take up the challenge and make one of these myself.
From the internet, I found 2 different versions:


I preferred the look of the first picture as this was not attached to the hat which made it a bit more versatile.
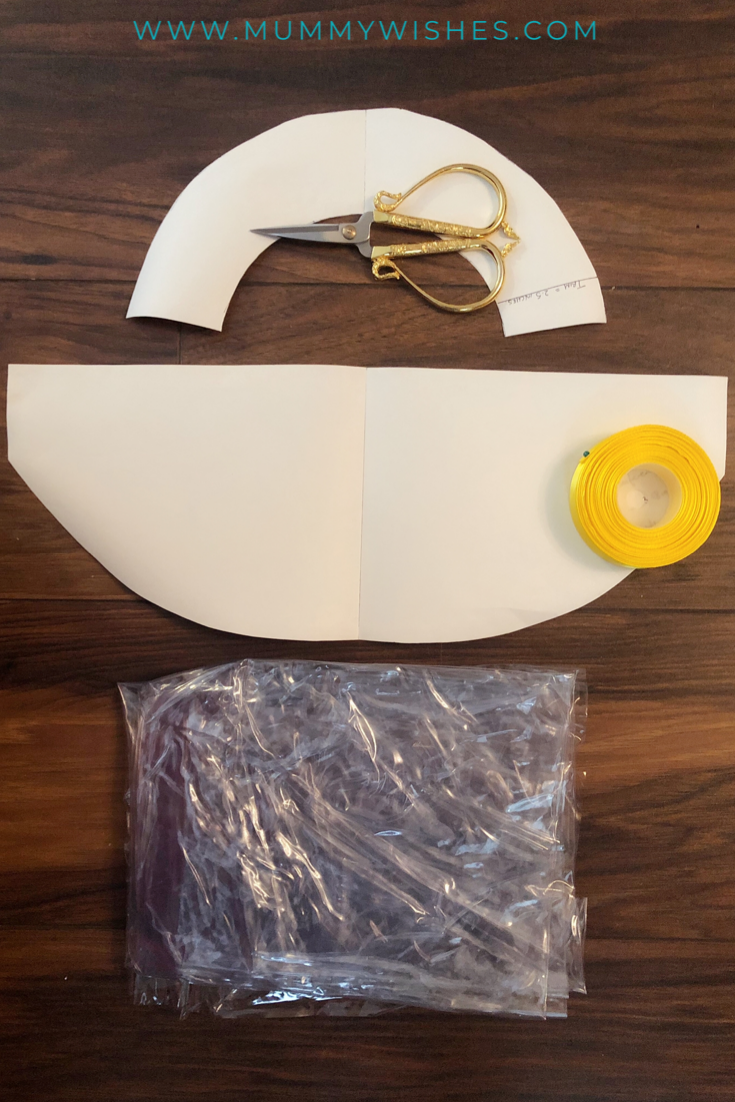
Materials:
- A3 size plastic sheet (I used an unused PVC tablecloth)
- 2.5 metre of ribbon or bias binding tape (2cm width)
- Face Shield Pattern
- Needle & thread or sewing machine
- Elastic (optional)
Step 1:
Download, print and cut the Face Shield pattern. You will need to fold the plastic sheet and then line up the pattern on top of it on the fold before cutting. Your cut out plastic should look like the cut out patterns below (unfolded).

Step 2:
Sew the ribbon/bias tape around the trim and visor.
Method 1: You can either sew each individual piece separately before sewing the trim and visor together, like this:

Or, you can.
Method 2: Sew ribbon/tape onto the bottom wide part of the trim AND top straight half of the visor before sewing together and then adding the outer rim.

If you are using a sewing machine for this project, I suggest using a needle and thread so sew the trim and visor together.

I prefer the second method as it resulted in much neater seams.
Lastly, with method 2, sew the top part of the trim leaving enough ribbon to tie around the back of the hat.

Note: With my first attempt (yellow face shield) I used an elastic band to hold the visor around the back of the hat. So please ignore the long piece of ribbon in the first photo (underneath method 1). I also hand sewed it using a blanket stitch, so the stitching is a bit uneven.

My boys don’t mind wearing them and they haven’t complained that it gets too hot and steamy. 😛 Hope this has helped you and if you have any questions, please drop me a comment below! 🙂
Happy crafting and until next time…
Love, MsMamaBean x


